Tag: PV mounting systems

  • How to Mount Solar Panels on the Ground: The Ultimate 2025 Guide
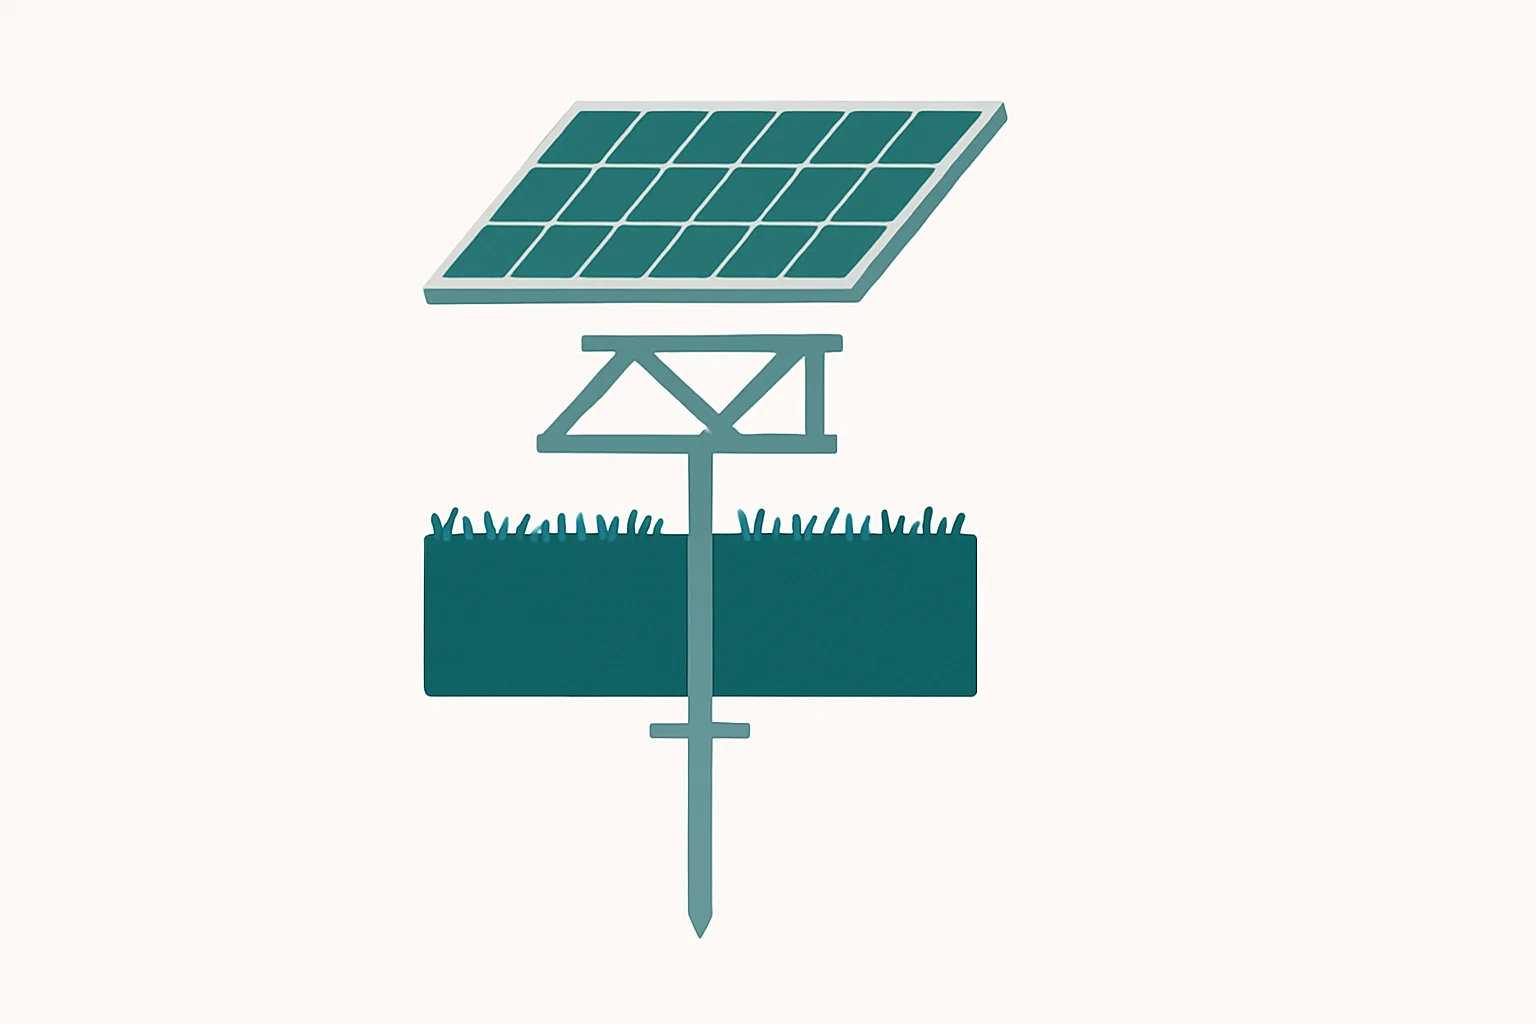
    As the demand for clean energy grows, ground-mounted solar systems are becoming an increasingly popular choice for commercial, industrial, and utility-scale projects. Unlike rooftop installations, ground mounts offer unparalleled flexibility in system size, orientation, and performance. But how do you go from an open field to a power-generating asset?

    The process is more than just putting panels on posts. It requires careful planning, engineering, and the right equipment. Here at Luminvolt, we specialize in providing the high-quality, durable solar racking that forms the backbone of these powerful systems. This guide will walk you through the essential steps and considerations for a successful ground-mounted solar installation.

    Why Choose a Ground-Mounted Solar System?

    Before we dive into the “how,” let’s quickly cover the “why.” For procurement managers and project developers, understanding the advantages of ground-mounted systems is key to making the right investment.

    • Optimal Orientation and Tilt: You aren’t limited by a roof’s direction or pitch. Ground-mounted systems can be perfectly oriented and tilted to maximize energy capture throughout the year.
    • Easier Maintenance and Cleaning: Technicians can safely and easily access panels for cleaning, inspection, and maintenance, reducing long-term operational costs.
    • Superior Scalability: Ground-mounted arrays are limited only by your available land, not your roof space, making them ideal for large-scale projects.
    • Improved Cooling: Panels installed on the ground benefit from better air circulation. This natural cooling effect helps them operate more efficiently.

    Step 1: The Foundation of Success – Site Assessment & Planning

    A successful project begins long before the first post is driven into the ground. A thorough site assessment is non-negotiable.

    Geotechnical Survey

    This is the most critical pre-construction step. A geotechnical report analyzes the soil composition, stability, and load-bearing capacity, which directly influences the type of foundation and racking system you can use.

    Topography and Shading Analysis

    A topographical survey maps the land’s contours to minimize expensive civil work. A shading analysis identifies potential obstructions that could cast shadows on your array and reduce its output.

    Permitting and Local Regulations

    Every jurisdiction has its own rules. Before finalizing a design, consult with the local Authority Having Jurisdiction (AHJ) regarding setback requirements, height restrictions, and load codes.

    Step 2: Choosing the Right Ground Mount Foundation

    With your site data in hand, you can select the optimal foundation. This is the critical link between the earth and your racking structure.

    Driven Piles (I-Beams or C-Posts)

    The most common and cost-effective foundation for large-scale projects. Steel piles are driven directly into the ground, offering fast installation and a strong load capacity.

    Helical Piles (Ground Screws)

    These are screwed into the earth and are excellent for a wide variety of soil conditions. They feature minimal soil displacement and a fast, quiet installation.

    Ballasted Systems

    A non-penetrating system that uses concrete blocks for weight. Ideal for sites where ground penetration is not allowed, such as landfills or protected areas.

    Concrete Piers

    A traditional method involving poured concrete footings. It’s extremely strong and suitable for small-scale projects or sites with very poor soil conditions.

    Luminvolt’s Expertise: Choosing the right foundation is complex. The experts at Luminvolt can analyze your geotechnical report and project requirements to help you select the most cost-effective and structurally sound racking and foundation solution.

    Step 3: Assembling the Racking Structure

    Once the foundations are in place, it’s time to build the “skeleton” of your solar array—the racking system. The process includes attaching vertical posts, installing horizontal rails, and adding bracing for strength. High-quality racking from a supplier like Luminvolt is made from corrosion-resistant materials to ensure a 25+ year design life.

    Step 4: Mounting the Solar Panels

    With the racking structure complete, PV modules are carefully positioned and secured to the rails using specialized mid-clamps and end-clamps. It is absolutely crucial to tighten all clamps to the manufacturer’s specified torque value to prevent damage or dislodging.

    Step 5: Electrical Wiring and Commissioning

    The final step involves all electrical work, which must be performed by a licensed electrician. This includes connecting panels into strings, running wires to combiner boxes, and connecting to inverters to ensure the system is safe, code-compliant, and ready for operation.

    Partner with the Right Racking Supplier

    A ground-mounted solar project is a significant investment. At Luminvolt, we provide engineered solutions optimized for your specific site, ensuring long-term durability, rapid installation, and maximum return on investment.

    Discuss Your Project Today